
Synology RackStation 8 Bay RS1221+ [Setup and Installation]
Synology RackStation 8 Bay RS1221+ is one of the most powerful Network Attached Storage tool available these days. It is most suited for short-rack depth environment. It is a perfect data backup solution for IT infrastructure. Let us take an example of Synology Active Backup for Business. It consolidates backup tasks for virtual environments too due to which restoration of files becomes easy. So, if you own the same NAS devices and want to install it, this blog will work as a user guide to you.
Package Contents
Before you head over to install the hardware of your RackStation, it is recommended that you make yourself aware of the package contents. This is to inform you that the Synology RackStation 8 Bay RS1221+ arrives with an AC power cord, C13-C14 power cord, drive trays key, and screws.
How to Set Up Synology RackStation 8 Bay RS1221+?
You need to prepare the tools and parts before setting up the NAS system. Therefore, ensure that you have a screw driver handy. Apart from this, you must have access to at least one 3.5” or 2.5” SATA drive. You can check the compatibility from the list of compatible products on Synology website. Once you prepare the tools, you can walk through the below-given instructions for installing the RackStation:
Installing Drives
- You, first of all need to install drives. Thus, remove the RS1221+ drive tray.
- Thereafter, place the 2.5” or 3.5” inches drive in the drive tray.
- Tighten the screws so that drive can stay secure in place.
- Now, you need to insert the drive tray into the bay that is empty.
- Push the handle inward and secure the drive tray.
- Using the drive tray key lock the drive tray handle.
Installing Memory Modules
- Shut down the NAS and disconnect all the cables connected to reduce chances of potential damage.
- Remove the screws on the top cover and lift it up.
- A pre-installed 4GB memory module can be seen there.
- Now, install the new module into the empty slot.
- Place the top cover of the NAS back and power it up after connecting the cable.
Note: If you want to ensure whether the Synology RackStation 8 Bay RS1221+ has recognized the new memory module, sign in to DSM and go to Control Panel > Info Center and check the Total Physical Memory.
Installing PCle Add-in Card on NAS
- Remove the top cover of your Synology RackStation 8 Bay RS1221+ just as you did while installing memory modules.
- Now, remove the screw that secures the expansion slot cover and then remove the cover.
- Insert the card into the slot after aligning the card connector with slot.
- Secure the newly inserted card by placing back the latch and fastening the screw.
- Reconnect the top cover and switch on your RackStation again.
Once the hardware of your Synology RackStation is installed, you can mount it to a 2-Post rack and lift it to a desired height. After that, you are left with the task of starting up the NAS and installing DSM on NAS.
How to Install DSM on Synology RackStation 8 Bay RS1221+?
The RackStation arrives with a built-in tool known as web assistant using which you can install the latest version of DSM from web. Here are the steps that will explain how to use web assistant of your Synology RackStation:
- Switch on your NAS and load a web browser on a computer connected to the same network as your RS1221+.
- Into the address bar, input find.synology.com or synologynas:5000.
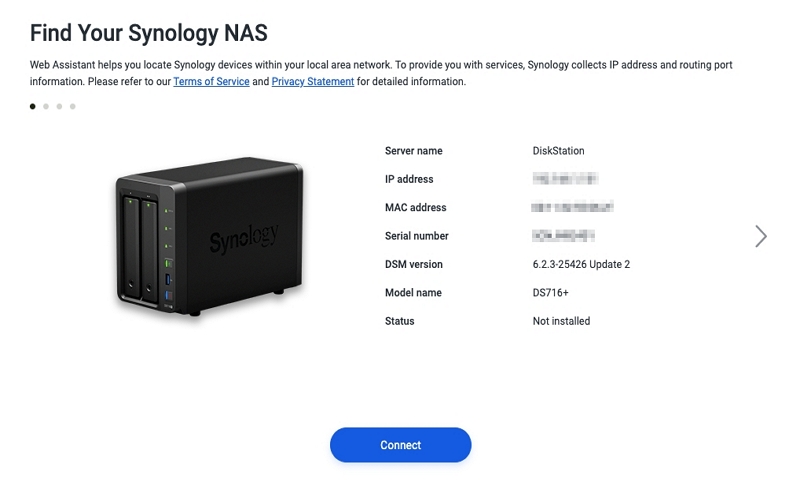
- The RS1221+ web assistant will show up on your web browser.
- The NAS within your local network will appear. You will see the status of your RackStation as “Not Installed”.
- Now, click Connect and follow the on-screen instructions to complete the setup.
The Final Words
It is now time to wrap up the post explaining how to set up Synology RackStation 8 Bay RS1221+. It is expected that you will be able to install the hardware of the NAS along with the DSM.