Synology QuickConnect: Key Details about DSM Management
The major benefit of installing a Synology NAS in the house or an organization is to create a unified storage space. It generates a space that can be accessed by everyone present on the same network as the NAS storage device. It is feasible with the find.synology.com URL. But, there are times when you are outside your house and feel the need to access your NAS. In that case, using the login URL becomes a difficult task. Worry not, Synology QuickConnect feature will help you in this context.
What is Synology QuickConnect?
QuickConnect Synology is a utility/feature using which one can client applications on Synology NAS storage device via an internet connection. Now, you might be wondering what’s new in this case. Well, you must know that accessing NAS remotely will require you to set up some port forwarding rules which are not needed once this software comes into the play. By connecting to the NAS remotely means your computer needs no connection with the network on which your Synology DSM is operating.
Steps for Synology QuickConnect Setup on DiskStation
You must connect to your Synology NAS web account in order to setup QuickConnect. Therefore, first of all, you have to access the web account before you connect to NAS storage device from anywhere over the internet. Here’s what you should do:
- Log in to your Synology DiskStation Manager as admin.
- Select Control Panel and choose External Access.
- Find QuickConnect and click it.
- Check the box labeled Enable QuickConnect.
- If you still have not logged in to your Synology account, you will be asked to do that.
- Specify your new QuickConnect ID.
- Hit Apply.
In this way, you can set up Synology QuickConnect. On the off-chance, your mood fluctuates and you decide to disable this feature, you are suggested to follow the steps highlighted above and uncheck the box against Synology Quick Connect.
Instructions of Using Synology QuickConnect Utility
It is assumed that with the help of the steps given in the previous section, you have successfully enabled the QuickConnect feature on your NAS device. Now, let us test whether you will be able to access your DSM remotely or not. Follow these steps. We are assuming that your Synology QuickConnect ID is abc-123.
- Connect your desktop/laptop to the internet.
- Load an internet browser such as Edge or Chrome.
- Type quickconnect.to/abc-123 and press Enter.
- You will find yourself on the NAS login portal.
- Complete the login process using the correct details and manage your NAS remotely.
Troubleshooting: Synology QuickConnect Not Working
If the QuickConnect feature is not working for you or you get the Synology QuickConnect unable to perform this operation error while connecting to the DSM remotely, follow these techniques:
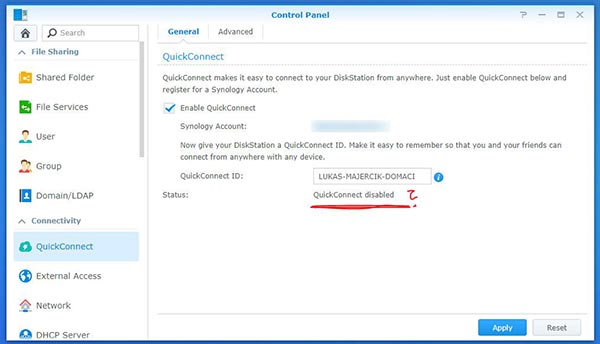
Check If QuickConnect is Enabled
Log in to your DSM via a device connected to the same network and check if the QuickConnect utility is enabled or not. If not, then you are suggested to follow the instructions mentioned in the first section to enable the feature.
Get the IP via DHCP
You are suggested to consider obtaining the IP address for your device via DHCP. All you have to do is open the Control Panel and select Network. After that, select Network Interface and hit LAN. Reach the IPv4 option via the Edit button and select Get Network Configuration automatically (DHCP).
Temporarily Turn Off IPv6
Log in to your Synology NAS and access the Network Interface settings. Click the LAN option and select Edit. Choose the IPv6 option and set the IPv6 Setup option as Off. Save the changes.
The Final Words
Our guide regarding the use of Synology QuickConnect feature for the remote management of the DiskStation Manager ends here. We hope that after taking care of the information mentioned in this blog, you will successfully be able to access your NAS device remotely without any Port Forwarding rule. On the off-chance the feature is not working for you, temporarily disable the firewall as a last resort.