What to Do If Synology Assistant Connection Failed?
Synology Assistant is tool that helps us to manage the Synology NAS in local area network. Form this assistant, you can share the printers, set up the LAN and configure network drivers. You can download it the Synology Assistant in your computer by going into the desktop utilities tab.
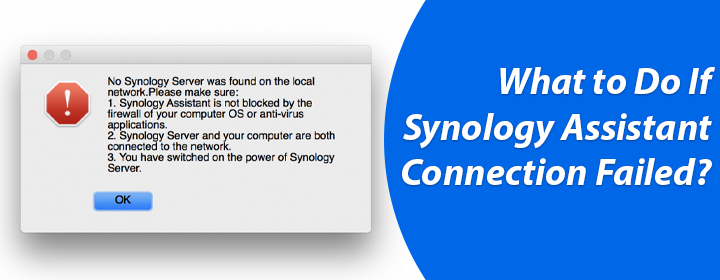
There is another tool which is same as the Synology assistant, it is known as Web Assistant which is accessible with find.synology. Sometimes, users face a rare issues, one of the problem is Synology Assistant connection failed. You can dispel this issue by following some of the troubleshooting tips, which you will find in this blog.
Synology Assistant Connection Failed- Solution
When your Synology Assistant show up the connection failed status that means there is a network configuration error. To solve this issue you have to configure the network settings again and apply some troubleshooting tips which are given down below.
Connect with Synology NAS
To access the Assistant, you have to connect your computer to the NAS device with the help of the Ethernet cable. Locate the computer and Synology NAS on the same network. Then adjust the firewall setting of your desktop to allow the Assistant through your Windows firewall.

Enter the Synology Assistant
This is a desktop utility, so you have to go to the Download Center and then select the Synology NAS model. After selecting the NAS model, go to the Desktop Utilities tab, here you will find the Synology Assistant.
Manage Network Settings
Now, you can enter the Assistant. Here, locate the Server option on the menu, click on it. Then you will see Setup tab. In this tab you can configure the network settings.
You also can manage the settings from the Synology Web Assistant. You can access it by an URL that us find.synology.com. Just type it into the address bar of the browser and you will reach inside the web Assistant. Here you just have to follow the same steps which are mentioned in the “Manage network setting” section.
There can be other reason of this issue as well, so do follow these troubleshooting tips written down here.
Troubleshooting Tips
- You have to make sure that the Synology NAS device is not placed close to any electronic device like microwave ovens or cordless phones.
- If the NAS device has more than one network port, then pull out the Ethernet cable and insert it into different network port.
- You can also try to run the Synology Assistant to another computer or laptop and then check if Synology Assistant connection failed or working good.
If no tip is working then you can try some other solutions that are written down here.
Some More Solutions
1. Restart the NAS Device
You can reboot the device to solve the issue. To restart, just shut down your Synology device and remove the drivers. You have to turn it again by pressing the power button. Now, check the status again on the Synology Assistant.
2. Reset Synology NAS device
If the Assistant is showing the same issue, then you can factory reset your NAS device. Press the RESET button (locate it at the back of the Synology NAS) for 5 seconds, then you will hear a beep sound and release the button. You have to wait for just 2 minutes until the status light on your device blink orange or green. Now, you have successfully reset your NAS and wiped the system configurations.
After the reset, the entire configuration data will be lost. You have to login again into the interface of the Synology NAS by entering login URL find.synology.com in the search bar of the browser. Then complete the installation process again from the beginning.
Conclusion
In the Synology Assistant, you can check Synology NAS status. You can check various things in this Assistant like progress, booting, quota, file system, configuration status, connection status, system online/offline, upgrading and much more. The problem of Synology Assistant connection failed is very rare to happen, but we shared solutions for this problem. Using the troubleshooting tips and other solutions you can easily dispel the connection issue. We hope you have successfully fixed the error and secured your data.