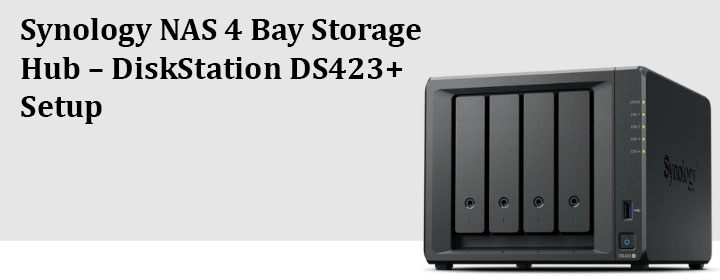
Synology NAS 4 Bay Storage Hub – DiskStation DS423+ Setup
Synology NAS 4 Bay storage hub is an all-in-one platform that can be used for online data sharing as well as management. The 4-bay DS423+ hub can help you secure, share, back up, and sync your media and online data. It has several built-in solutions that let the user create their private cloud, stream and organize music, audio, images, etc. across a variety of devices. Users can also set up an intuitive surveillance system with the help of this very Synology DSM hub.
Key Features of Synology NAS 4 Bay Storage Hub
Before we start discussing the installation process of the DSM hub, we would like to shed some light on a few highlights that make it so special:
- You can store up to 72 TB of data in a single space. You will have 100% ownership of the data and also enjoy simultaneous access to various platforms.
- Stable data transfers due to 226/224 MBs sequential read-write throughput.
- The 4-Bay DS423+ hub has built-in management tools for file and photo management. Apart from this, you can use these management tools to protect data and manage surveillance systems.
The Synology NAS 4 Bay storage hub lets you access your data anytime anywhere. You can do so with the help of a web browser installed on your PC without going through complex port forwarding settings. You will only need SYNOLOGY QUICKCONNECT software for that.
How to Set Up Synology NAS 4 Bay (DiskStation DS423+)?
Here are some crucial steps involved in the installation process of the DiskStation DS423+. For easy understanding, we have categorized the installation process into three stages. The first part will talk about the preparation of tools and parts for component installation. In the second part, we will share some information regarding the installation of drives whereas the third part will be all about running the NAS.
Step 1: Tool and Parts for Installation
You will have to arrange the following things before you start configuring your NAS 4-Bay storage hub:
- A screwdriver
- A SATA (Serial Advanced Technology Attachment) drive at least 3.5” or 2.5”

Note: You should back up the important data if you choose to install a drive that already contains data. Otherwise, the system will format the drive and existing data will be lost forever.
Step 2: Install Drives
Now, it is time to install the drives on your storage hub. You can do so with the help of the following instructions:
- Put the back cover down very carefully after removing the 4 screws at the back.
- You should now lift the upper case and place it aside.
- Place the 3.5” or 2.5” drives into the given trays and tighten the screws.
- You need to flip the tray over to install the 2.5” drives.
- Now, you need to insert the loaded tray into the Synology NAS 4 Bay storage hub.
- Install the drives and put the upper case back in its position.
- Close the back cover and tighten the cover lastly.

Note: If you are thinking of creating RAID volume, you are suggested to install drives of identical size. Doing so will ensure that the drive capacity will be used in the best way.
Step 3: Start Up Your Synology NAS 4 Bay
- Using the LAN cable, connect your Synology NAS to the switch, router, or hub.
- Power up Synology NAS storage hub after connecting its power cord to the adapter.
- Press the Power button on your NAS.
- Congratulations! Your Synology DiskStation DS423+ is online now.

You are now free to manage your Synology NAS storage device via the find.synology URL on a computer connected to the same network as your NAS. Let us now shed some light on the System modes and LED indicators.
System Mode Descriptions DiskStation DS423+
| S. No. | System Mode | Description |
|---|---|---|
| 1 | Powering on | It happens when you press the Power button. Hardware initialization takes place. |
| 2 | Shutting down | NAS shuts down when you press the Power button while it is in operation. |
| 3 | DSM not ready | DSM is not ready for use because it is not installed properly, or the device is booting up. It also happens when the attached UPS has insufficient power |
| 4 | DSM ready | Synology NAS 4 Bay is functional. You can log in. |
| 5 | Hibernation | The NAS storage device is idle and has entered hibernation mode. |
| 6 | Application | Certain services will control the LED actions. |
| 7 | Powered Off | NAS is not getting power. |
System Modes and LEDs in Synology NAS 4 Bay Hub
| S. No. | System Mode | Power LED [Blue] | Status LED [Green] | Status LED [Orange] |
|---|---|---|---|---|
| 1 | Powering on | Blinking | Off | Off |
| 2 | Shutting down | Blinking | Static | Off/Static |
| 3 | DSM not ready | Static | Blinking | Off/Blinking |
| 4 | DSM ready | Static | Static | Off/Static |
| 5 | Hibernation | Static | Off | Off/Static |
| 6 | Application | Static | Switching | Switching |
| 7 | Powered Off | Off | Off | Off |
General Troubleshooting Related to Synology DS423+
Here are a few troubleshooting techniques that will help you get rid of NAS-related issues in general:
- Ensure that your storage hub is connected to a functional socket.
- DiskStation and drives should be compatible.
- Restart the system if the problem does not get resolved.
- Check the interior and exterior of the network port. It should not be damaged.
- Reset your DiskStation and set it up again.
To Sum Up
Here ends our complete guide on Synology NAS 4 Bay storage hub. Here, you got to learn about the setup process as well as the LED descriptions of the hub. You also got familiar with the general troubleshooting techniques in case any problem shows up. Now, we hope that you will be able to get the device installed successfully.